

How to configure PRP on a LANTIME?
What is PRP?
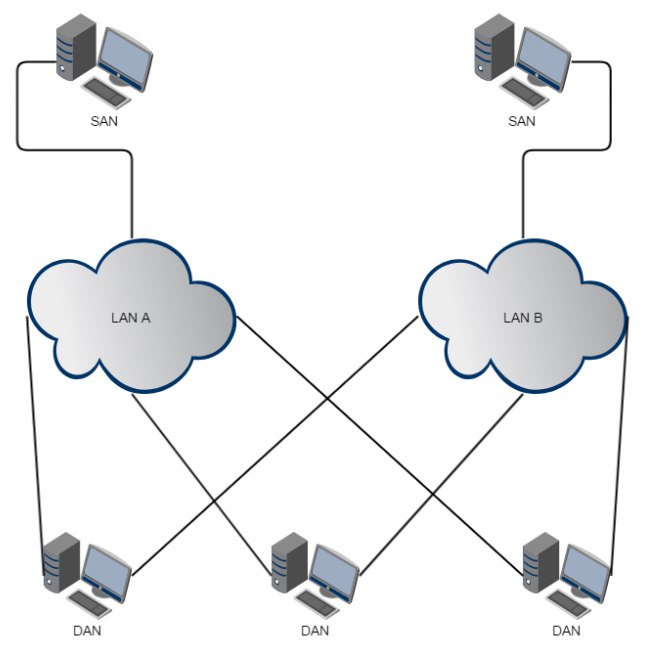
PRP stands for Parallel Redundancy Protocol and is defined in the standard IEC 62439-3 since 2010. PRP is Layer-2 based and has been developed for computer networks which are in need of a reliable solution regarding high availability and operational functionality. A LANTIME with two or more interfaces, running firmware 6.22.001 or higher, has the ability to act as a DAN ("Dual Attached Node" - A device which is connected to both redundant networks).
Configuring the LANTIME
PRP can be used if your LANTIME is running firmware version 6.22.001 or newer. LantimeOS (LTOS) 7.00.001 or a newer Version 7 firmware does also have the support for PRP included. However, in LTOS V7 the configuration is way easier than it had been in V6.
Configuration under LTOS V6
The LANTIMEs PRP configuration is done through webinterface using the manual configuration. Open the manual network configuration of the LANTIME this way:
"System" > "Services and Functions" > "Manual Configuration" > "Network Configuration"
Depending on the physical interfaces you want to configure for PRP, you have to search for the specific sections in the file. For this example, we will configure LAN1 [PHYSICAL INTERFACE 1] and LAN2 [PHYSICAL INTERFACE 2] to a particular PRP group. The configuration below is showing a default configuration of the physical interfaces of a LANTIME.
[PHYSICAL INTERFACE 1]
MAC-ADDRESS=ab:cd:ef:00:11:22
NET-LINK-MODE=AUTO
BONDING=
INDICATE-LINK=OFF
SUPPORTED-MODES=AUTO 10HD 10FD 100HD 100FD
IPV6-MODE=DEACTIVATED
IMS-SLOT-NUM=0
POWER-OFF=NO
PRPGROUP=-
[PHYSICAL INTERFACE 2]
MAC-ADDRESS=ab:cd:ef:33:44:55
NET-LINK-MODE=AUTO
BONDING=
INDICATE-LINK=OFF
SUPPORTED-MODES=AUTO 10HD 10FD 100HD 100FD
IPV6-MODE=DEACTIVATED
IMS-SLOT-NUM=0
POWER-OFF=NO
PRPGROUP=-
The PRPGROUP parameter is responsible for the PRP configuration of the LANTIME. By default, PRP is deactivated, which is indicated with a "-" as value. In order to activate PRP on LAN1 and LAN2, just change the value from "-" to the digit "0". This value has to be configured on all physical interfaces, which shall run in the same PRP group. After editing the file, press "Save Settings". You will be prompted to confirm a message, which informs you that you have changed a configuration file manually. Please reload the configuration by confirming with "OK" .
If you want to configure more than one PRP network and want to use another pair of network interfaces as a PRP group, please enter enter a "1" for both ports.
[PHYSICAL INTERFACE 1 & 2]
...
PRPGROUP=0
[PHYSICAL INTERFACE 3 & 4]
...
PRPGROUP=1
Important: It is not allowed to configure a Bonding on an interface where PRP is already running. On the other hand do not configure PRP on an interface, which is assigned to a Bond.
Configuration under LTOS V7
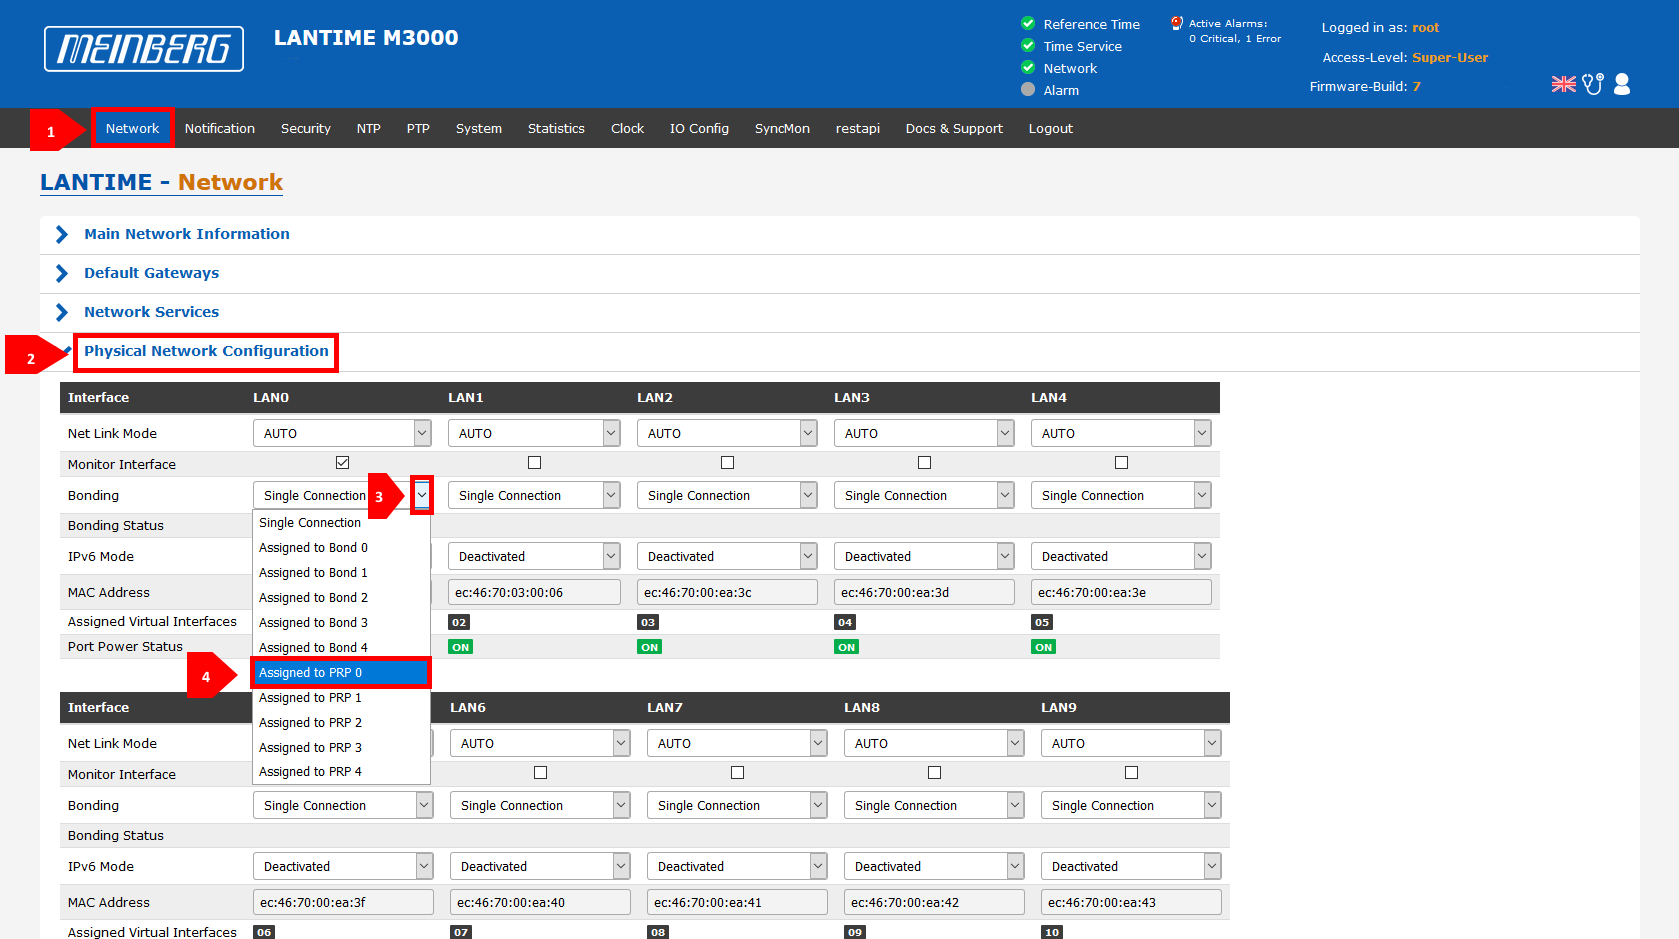
The PRP interface can be configured in the same way as it is possible in LTOS V6. Furthermore the LANTIME WebUI can also be used for that. Therefore please browse to the "Network" Chapter in the LANTIME WebUI and open the "Physical Network Configuration" Subchapter.
Find an example screenshot below.
Once you've assigned the desired interfaces to a specific PRP group, please save the configuration by clicking the "Save Settings" button.
